


Thankyou Justin Bowra for this post.
Ultrasound for interstitial lung disease and pulmonary oedema
Key points
B lines are found in pulmonary oedema and in other interstitial syndromes
B lines start at the pleural line, move with breathing, are very bright, and reach much further down the screen (more than 10cm) than any other lung artefacts
But you have to look at the pattern: e.g. bilateral symmetrical crackles suggest cardiogenic pulmonary oedema, while unilateral crackles suggest other pathology such as pneumonia.
Want to find B lines? Here’s how:
1. Select the curved probe (NOT linear probe)
2. Set the depth to 15cm
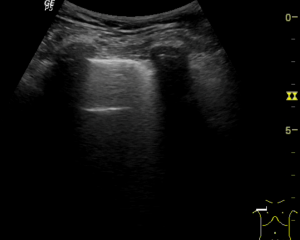
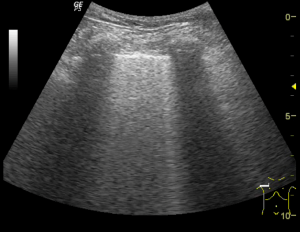
3. Turn off the ‘filters’ (tissue harmonics and multi beam / compounding) (image 1 ‘B lines with filters on’ and image 2 ‘B lines with filters off’ in the same patient)
4. Move the focal zone to the level of the pleural line (see image 3 ‘incorrect focal zone’ image 4 ‘correct focal zone’ in the same patient)
5. Turning up the far gain can help if you’re not sure (see image 5 ‘far gain not adjusted’ and image 6 ‘far gain turned up’)
- Filters on 2. Filters off

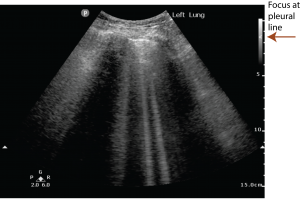
3. Incorrect focus 4. Correct Focus

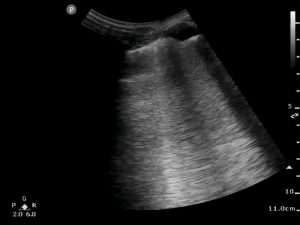
5. Far gain not adjusted 6. Far gain turned up
Excellent teaching